Easy Instant Pot Butternut Squash for Soups, Mash & More
Butternut squash is a quintessential fall and winter vegetable, beloved for its sweet, nutty flavor and creamy texture. It's incredibly versatile, starring in everything from comforting soups and hearty stews to silky mashes and satisfying casseroles. However, many home cooks dread the preparation process – wrestling with its tough skin, the long, thick neck, and the fear of slipping while chopping can turn what should be a simple task into a kitchen ordeal.
Enter the Instant Pot. This beloved kitchen appliance isn't just for quick weeknight dinners; it's a revolutionary tool for preparing tricky vegetables like butternut squash. Forget the tedious peeling, chopping, and the balancing act on your cutting board. The Instant Pot transforms the toughest butternut into tender, usable flesh with remarkable speed and ease, making it accessible for any recipe, any day of the week.
Why the Instant Pot is Your Butternut Squash Game Changer
If you've ever battled a butternut squash with a vegetable peeler and a chef's knife, you know the struggle is real. Its awkward shape, particularly the bulbous bottom and slender, hard neck, makes it notoriously difficult to peel and dice safely and efficiently. Many people simply avoid cooking with fresh butternut squash for this reason, opting for pre-cut (and often pricier) alternatives.
The Instant Pot completely bypasses this initial headache. The magic lies in its ability to cook the squash whole or in large halves, skin and all. This means you can significantly cut down on prep time and eliminate the risk associated with handling a slippery, rolling squash. In mere minutes, your pressure cooker will deliver perfectly tender squash that's effortless to scoop out, turning you into a butternut squash magician without the peeling peril.
The Two Easiest Methods: Whole or Halved (No Peeling Required!)
The beauty of cooking butternut squash in an Instant Pot is the absolute minimal prep. You essentially have two fantastic options, both of which allow you to skip the dreaded peeling step entirely. Whether your squash is destined for a velvety smooth soup, a sweet and savory mash, or to be incorporated into a hearty casserole, these methods guarantee perfectly cooked results every time.
Method 1: Cooking a Whole Butternut Squash
This is truly the ultimate "set it and forget it" approach for preparing butternut squash. It's ideal if your squash fits comfortably inside your Instant Pot without any forcing.
1.
Prepare the Pot: Place the trivet (the metal rack that came with your Instant Pot) at the bottom of the inner pot.
2.
Add Water: Pour 1 to 1.5 cups of water into the Instant Pot. This creates the steam necessary for pressure cooking.
3.
Position the Squash: Carefully place the whole butternut squash on top of the trivet. Ensure it's not submerged in the water.
4.
Pressure Cook: Secure the lid on your Instant Pot, making sure the sealing ring is properly in place. Flip the steam release valve to the "sealing" position. Select the "Manual" or "Pressure Cook" setting and set the cooking time to
20 minutes on High Pressure.
5.
Natural Release: Once the cooking cycle is complete, allow for a
Natural Pressure Release (NPR) for 10 minutes. This means you do nothing and let the pressure come down gradually. After 10 minutes, carefully switch the steam release valve to "venting" for a
Quick Release (QR) of any remaining pressure.
6.
Cool and Prepare: Carefully remove the squash from the Instant Pot and let it cool on a cutting board until it's comfortable to handle. Once cooled, slice the squash in half lengthwise. Scoop out the seeds and stringy bits from the center. The skin will be incredibly soft and will either slip right off or can be easily scooped away from the tender flesh with a spoon. You're now ready to mash, puree, or cube your cooked butternut squash!
For a deeper dive into this incredible method, check out our dedicated guide:
Instant Pot Butternut Squash: Cook Whole & Skip Peeling!
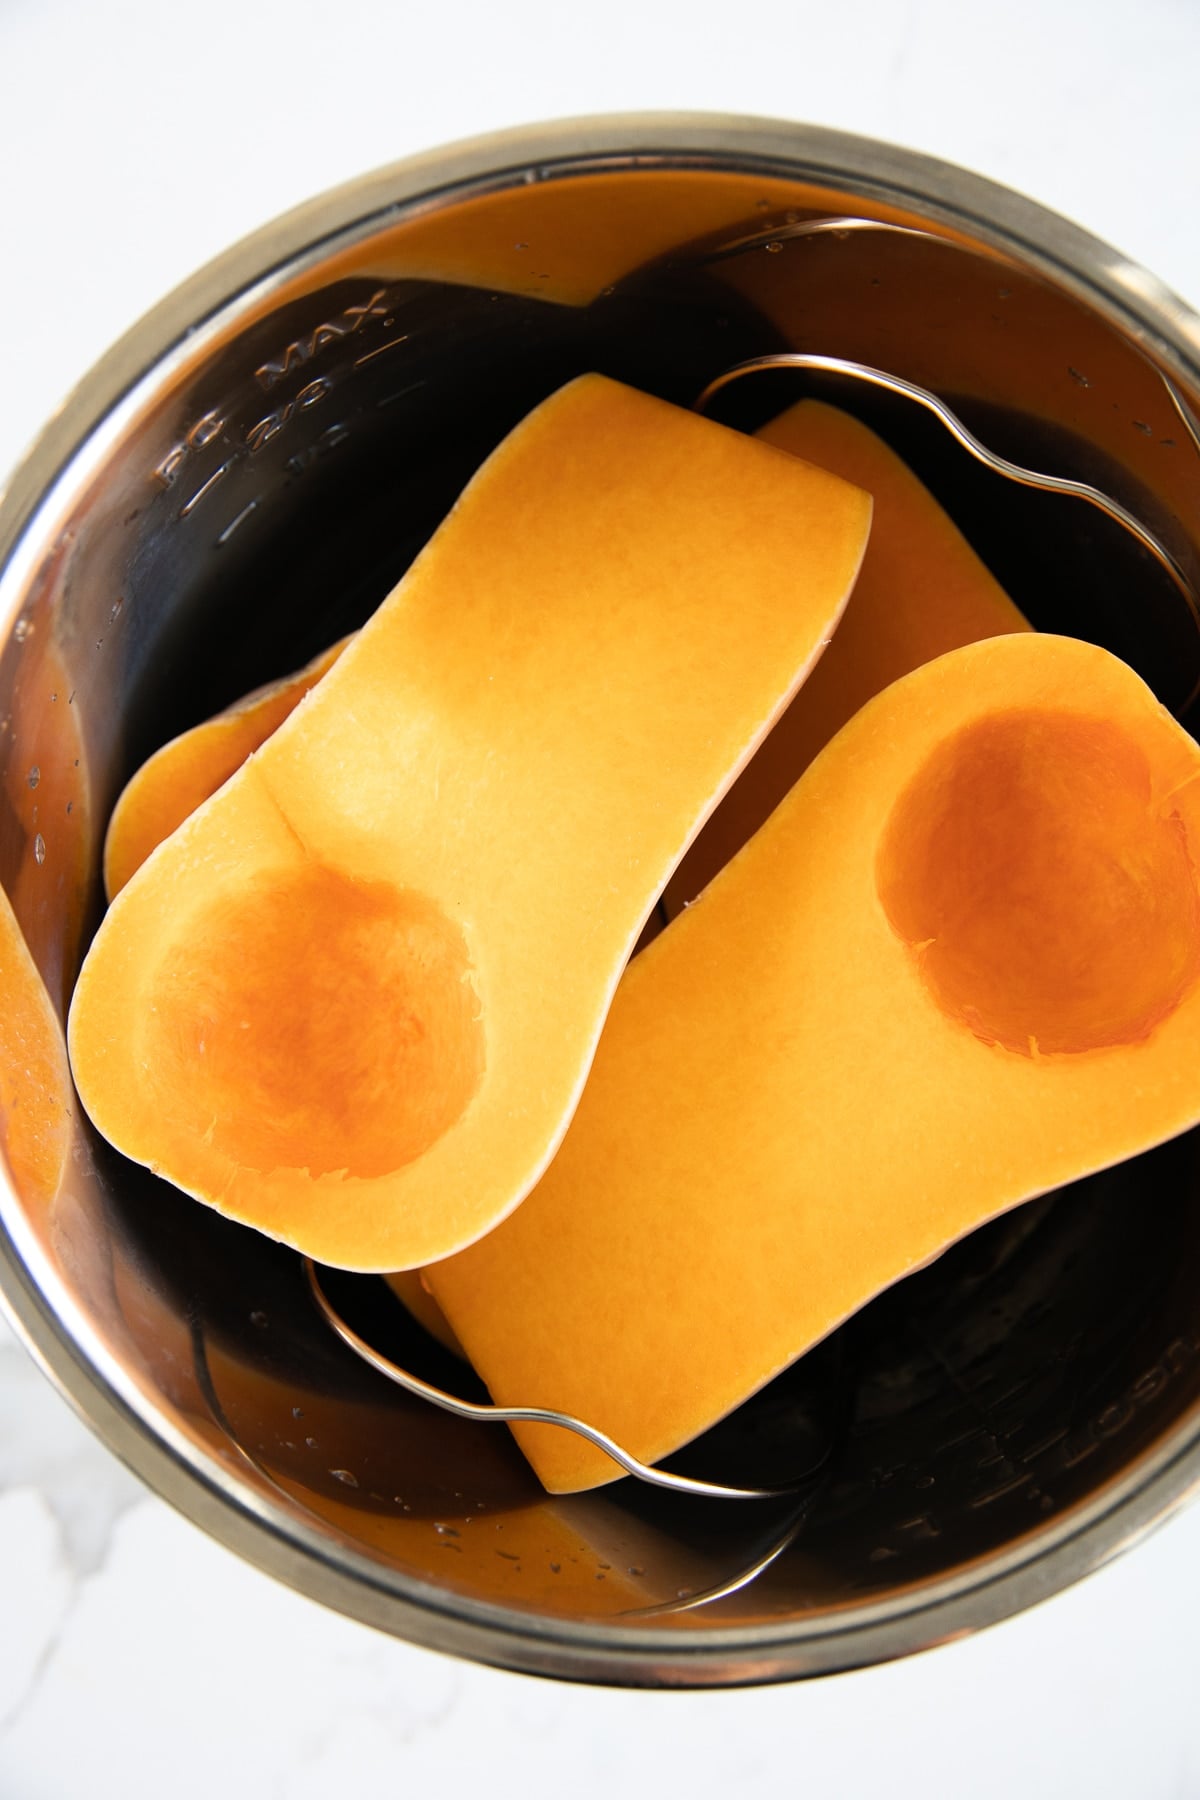
Method 2: Cooking Butternut Squash Halves
If your butternut squash is too large to fit whole in your Instant Pot, or if you simply prefer working with halves, this method is equally effortless.
1.
Prepare the Squash: Carefully cut the butternut squash in half lengthwise. A sharp, sturdy knife and a stable cutting surface are key here. You still don't need to peel it! Scoop out the seeds and stringy bits from both halves.
2.
Prepare the Pot: Place the trivet at the bottom of your Instant Pot. Add 1 to 1.5 cups of water.
3.
Position the Squash: Place the butternut squash halves cut-side up or down on the trivet. If needed, you can stack them if your pot is large enough, but ensure they are stable.
4.
Pressure Cook: Secure the lid, ensure the valve is set to "sealing," and set the Instant Pot to "Manual" or "Pressure Cook" for
7 minutes on High Pressure.
5.
Natural Release: As with the whole squash method, allow a
Natural Pressure Release (NPR) for 10 minutes, then perform a
Quick Release (QR) of any remaining pressure.
6.
Cool and Prepare: Remove the cooked squash halves and let them cool. The flesh will be incredibly soft and easy to scoop out directly from the skin.
This quick method is perfect for getting tender squash on the table in record time. Discover more details here:
Quick Instant Pot Butternut Squash: Whole or Halved in Minutes.
Beyond Basic: Flavor Enhancements & Creative Uses
Once you have your perfectly tender Instant Pot butternut squash, the culinary possibilities are endless. Here's how to elevate its flavor and incorporate it into various dishes:
Flavor Boosters
*
Sweet & Savory Mash: For a simple side dish, mash the cooked squash with a pat of butter, a pinch of salt, and a dash of black pepper. For a sweeter profile, add a tablespoon of brown sugar or maple syrup, a pinch of cinnamon, nutmeg, or even a touch of ginger.
*
Toasted Nuts: To add a delightful crunch and nutty depth, toast some sliced or slivered almonds. Simply spread them in a dry skillet over medium heat, stirring constantly until lightly browned and fragrant. These are excellent sprinkled over mashed squash or butternut squash soup.
*
Herbs: Fresh sage, thyme, or rosemary pair beautifully with butternut squash. You can sauté them in butter and stir into your mash or soup.
*
Roasting After Pressure Cooking: For an extra layer of flavor and slight caramelization, scoop out the cooked squash, toss it with a little olive oil, salt, pepper, and herbs, then spread it on a baking sheet and roast at 400°F (200°C) for 10-15 minutes. This is great for a richer side dish.
Versatile Applications
*
Silky Soups: This is arguably where Instant Pot butternut squash shines brightest. Puree the cooked squash with vegetable or chicken broth, a touch of cream or coconut milk, and your favorite spices (curry powder, ginger, nutmeg, or sage). Blend until smooth for a luxurious, comforting soup.
*
Creamy Mash: Serve it as a healthy alternative to mashed potatoes. Season simply or get creative with additions like roasted garlic, Parmesan cheese, or a swirl of crème fraîche.
*
Risottos and Casseroles: Dice the cooked flesh and incorporate it into risottos, stratas, or baked casseroles. It adds natural sweetness and a lovely creamy texture.
*
Healthy Add-ins: Fold it into macaroni and cheese, add it to curries for extra body, mix it into burritos or tacos for a vegetarian boost, or even use it as a base for baby food purees.
*
Baked Goods: Believe it or not, pureed butternut squash can be used in muffins, breads, and even pies, similar to pumpkin puree, adding moisture and nutrients.
Pro Tips for Perfect Instant Pot Butternut Squash Every Time
Achieving consistently perfect Instant Pot butternut squash is simple, but a few expert tips can ensure the best results:
*
Choose Wisely: Select a butternut squash that feels heavy for its size, with smooth, dull skin and no soft spots or blemishes. Avoid shiny skin, which can indicate it was picked too early.
*
Adjust Cooking Time for Density: While our times are generally perfect, remember that very dense or exceptionally large squash might benefit from an extra minute or two of pressure cooking. Conversely, a smaller, thinner squash might be done a minute faster. Always test for tenderness with a fork.
*
Safety First: Always ensure your Instant Pot lid is properly sealed and that you follow pressure release instructions carefully. Steam is hot!
*
Cool Before Handling: Resist the urge to cut into the squash immediately after removing it from the pot. Letting it cool for 5-10 minutes makes it much easier and safer to handle.
*
Don't Waste the Seeds: Just like pumpkin seeds, butternut squash seeds can be rinsed, tossed with a little oil and salt, and roasted in the oven for a delicious, crunchy snack.
*
Storage: Cooked butternut squash can be stored in an airtight container in the refrigerator for up to 3-4 days. For longer storage, portion out mashed or pureed squash into freezer-safe bags or containers and freeze for up to 3 months. Thaw in the refrigerator before use.
*
Acorn Squash Alternative: If you're out of butternut, remember other winter squashes like Hubbard, kabocha, and buttercup make excellent substitutes. Even acorn squash, though ridged and difficult to peel, can be pressure cooked unpeeled and used for mash or soup, just like butternut.
The Instant Pot truly demystifies butternut squash preparation, transforming a sometimes daunting task into an effortless culinary adventure. With minimal fuss and maximum flavor, you'll find yourself reaching for this nutritious and versatile vegetable more often than ever before. Enjoy the ease and deliciousness!